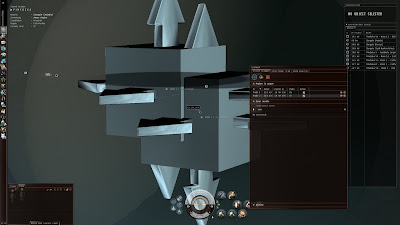
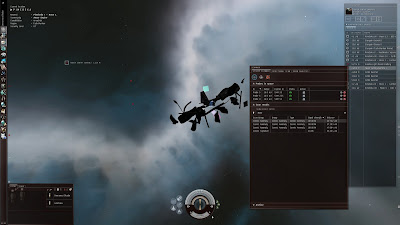
Figure 1 - Seeing the probe positioning arrows and their range sphere.

Figure 2 - Whoa! Expanded to maximum range of 32 AU (Core Probes). Slight overlap ;)

Figure 3 - A hit! When something is detected by only one probe, you see a pale blue sphere indicating the area it can be found in. You can click through the items in the scan list to see the respective blue spheres of various sizes. Even though some items are at 100% scan strength, you need to have it in the range of three probes in order to triangulate and warp to it.

Figure 4 - When in detected by two probes, you get a red circle indicating the intersection area. Each red circle represents a different item in the list, click through them to see each one in turn.

Figure 5 - Just showing one red circle from the list. Notice how the scan strength of the Cosmic Signature is really low? I assume you need to really zone in with low range / high strength probes to find that sucker. Next time I'll work on that but this time I'm going for a much easier to find Cosmic Signature.

Figure 6 - Triangulated! When a signature is within range of three probes, it shows up as a dot on the map. Red dots means the scan strength is not 100% and you cannot warp to it, thus you need to get stronger probes with shorter range on it. Green dots are 100% strength and warpable. As you enter warp, sometimes you get DED announcements like the one below.

Figure 7 - At this point, Twin B woke up and in the process woke up Twin A so my wife and I rushed up stairs to spend the next fifteen minutes settling down the babies and putting them back to bed. What did I come back to?

Whoops! I guess I should have cancelled warp. Oh well, test server. Everything is on the cheap there.
Overall the whole process took me 30 minutes to figure out, most of which was spent fiddling with moving probes around, playing with the ranges, and trying to figure out how to overlap properly. Once I had the two probes giving red circles, the triangulation was child's play.
Next time I'll work on tracking down a harder signal and see how long that takes.


Now are the range spheres in fact spheres in your testing or more square like shown in your screen shots?
ReplyDeleteIn figure 1 you can see the dark grey translucent sphere around the probe? That's the range sphere. The cube at the centre around the probe is the movement cube. You can either grab the cube and try to place the probe or use the directional arrows.
ReplyDeleteAhh I see it. So the placement works just like setting up POS modules. Looks pretty nice.
ReplyDeleteKK: Interesting that you got a warpable result with only three probes. Devs stated at a minimum you would need four to get a warpable result. Might want to post your findings and screenies on the wormhole sticky in the Game Developement forum documenting this.
ReplyDeleteRegardless, thanks for doing the in depth look at scanning for us. The lack of Astrometrics V prevents me from doing any real testing until they fix that bug.
Four probes? Whatever for? Triangulation needs three vectors, hence the "tri" part of the word. I'll check the forums and put a link there but I suspect someone made a typo.
ReplyDeleteOk, from the forums:
ReplyDelete"
The basic principle of the new system is that each probe just generates a distance to whatever it scans. If you have two probes scanning the same thing, those two distances resolve to a circular result. Three probes will give you two results*, one above the plane and one below. Four gives you a solid hit which you can warp to.
The result doesn't become warpable until you get a hit with four probes.
Also, you do have to triangulate - there are measures in place to stop you cheating and dropping four probes in the same spot :)
* If the distance between the two results is very small (due to the three probes being roughly coplanar with the target) we collapse them into a single result for convenience."
That last paragraph explains it. Three probes gave me two results but they were virtually on top of each other so the game presents it as found.
When I was thinking triangulate, I thought probes gave a vector but instead they only give a range. Hence why two probes give a circle which represents the spot two ranges overlap.
They should have done triangulation ages ago. Awesome work KK.
ReplyDeleteAh ok that explains it yea.
ReplyDelete